Getting started with Fireball
Connect your accounts and complete the essential setup for accurate budgets, cash-flow insights, net worth tracking, and a useful FIRE plan.
Fireball brings your accounts, transactions, budgets, goals, and FIRE plan
together in one place. This guide takes you through the essential setup so the
app can give you a useful picture of your money.
You do not need to finish everything at once. Fireball saves your progress, and
the Getting Started guide on the Home screen will point you towards the next
useful step.
Your setup checklist
1. Connect your bank accounts.
2. Check that your everyday accounts and loans are understood correctly.
3. Review at least one transaction category.
4. Choose a budgeting style and create your first budget.
5. Review recurring payments and income.
6. Check the assumptions behind your FIRE plan.
7. Explore the insights created from your data.
1. Connect your bank accounts
Fireball connects to New Zealand banks through Akahu, a New Zealand
open-finance platform. You need an active Fireball subscription to connect or
reconnect a bank.
To connect your first bank:
1. Open Accounts.
2. Tap Get started, then Connect a bank.
- If you already have financial data in Fireball, tap the + button and
choose Connect bank account.
3. After reading How we use your data, tap Continue to Akahu.
4. In Akahu, choose your bank and sign in through its secure hosted screen.
5. Select the accounts you want Fireball to read.
6. Approve the connection and return to Fireball.
Include the account you use for everyday debit or EFTPOS spending. If you
connect only a mortgage, credit card, KiwiSaver, or investment account,
Fireball may not have enough information to build a complete income and
spending picture.
Fireball never sees your online banking password. The connection is read-only,
so Fireball cannot move money into or out of your accounts.
What happens after connecting
Fireball imports your accounts, balances, and recent transactions. It fetches
the most recent three months of transactions first, then fills in older history
up to the previous 12 months in the background.
You can continue setting up Fireball while the older history loads. Totals,
trends, and recurring-payment suggestions may change as more transactions
arrive.
To connect another bank later, open the main menu, select Bank Connections, and tap the + button.
2. Review your connected accounts
Fireball normally recognises account types automatically. After connecting, it
may ask for help when an important account detail is missing or ambiguous.
Complete any account items shown in Needs review on the Home screen.
If no everyday account is found
If every connected account looks like debt or an investment, Fireball displays
No everyday account found. Choose:
- Connect another account to return to Akahu and share the account you use
for everyday income and spending.
- Continue with these accounts if you deliberately want to track only the
accounts already connected.
Continuing dismisses the reminder. It does not turn a mortgage, credit card, or
investment account into an everyday account.
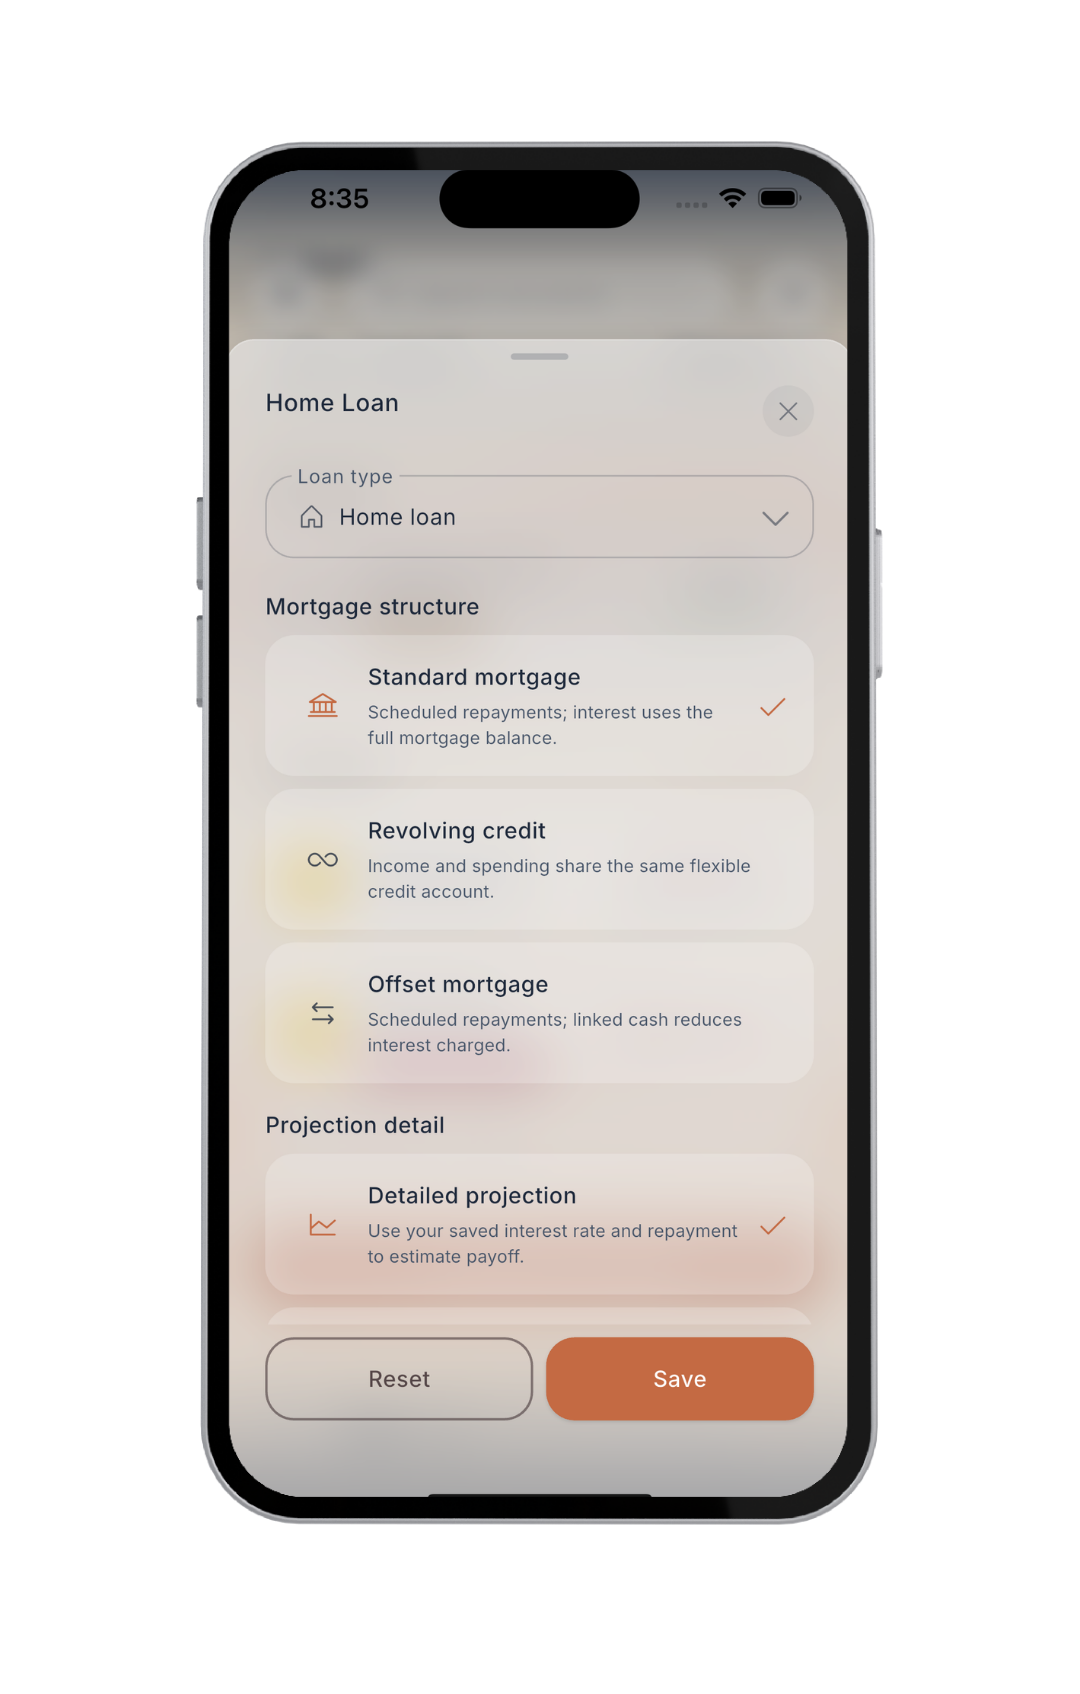
Configure loans and mortgages
Open Accounts and find each debt account. Tap its configuration prompt,
such as Tap to configure this loan, Loan needs rate and repayment, or
Choose detailed or balance-only tracking.
Depending on the account, Fireball may ask you to confirm:
- Whether it is a home loan, investment-property loan, or another loan
- Whether the structure is standard, revolving credit, or offset
- Whether to build a detailed payoff projection or track only the balance
- The interest rate and repayment information needed for a detailed projection
Choose Track balance only if you want to include the current debt without
estimating its repayment path. Choose Detailed projection when you can
provide the requested information and want Fireball to estimate payoff
progress.
3. Review transaction categories
Categories tell Fireball what your transactions represent. They affect budgets,
spending insights, savings calculations, and your FIRE plan.
To correct a posted transaction:
1. Open Activity
2. Find and tap the transaction.
3. On the Category tab, choose the best category.
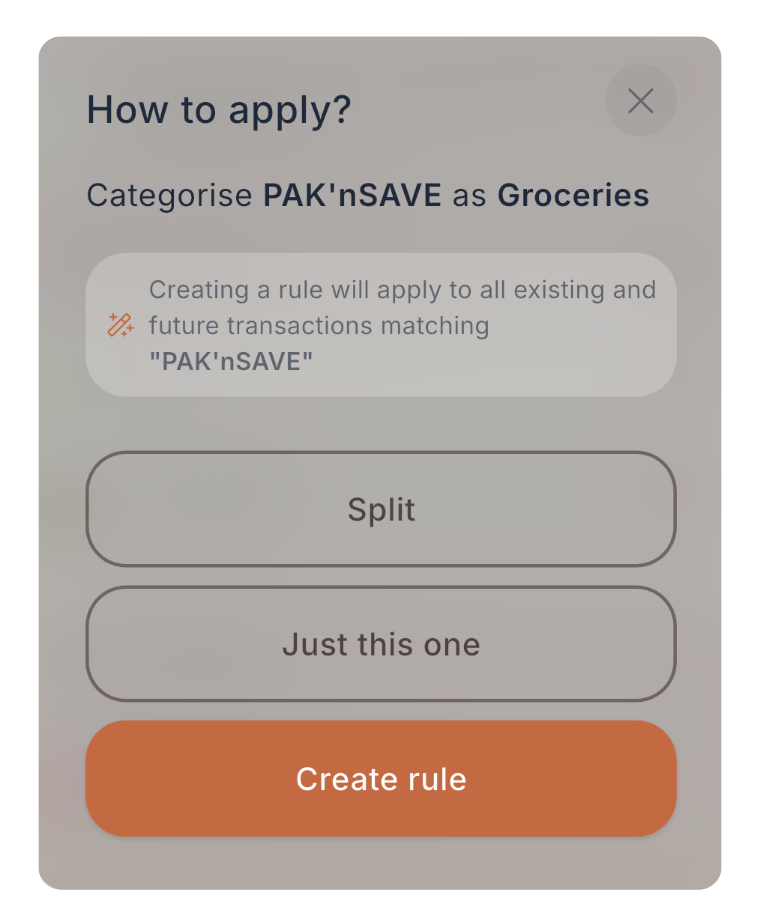
4. At How to apply?, choose:
- Split to divide an expense between multiple categories.
- Just this one for a one-off correction.
- Create rule for existing and future transactions matching the displayed merchant or description.
Pending bank transactions cannot be edited because their amount or description
may still change. Try again after the transaction has been posted.
To focus on uncategorised activity, open Activity → Filter & Sort, then
select Uncategorised under category source. If AI categorisation is
available and enabled for your account, you can also review its suggestions
from this list.
In the side menu, manage custom categories under Organise → Categories and saved rules under Organise → Rules.
4. Create your first budget
Open Budget. If you have not created a budget yet, Fireball asks How would
you like to budget?
Choose the style that best matches how you want to plan:
- Single Budget: set one total spending limit and track all expenses together.
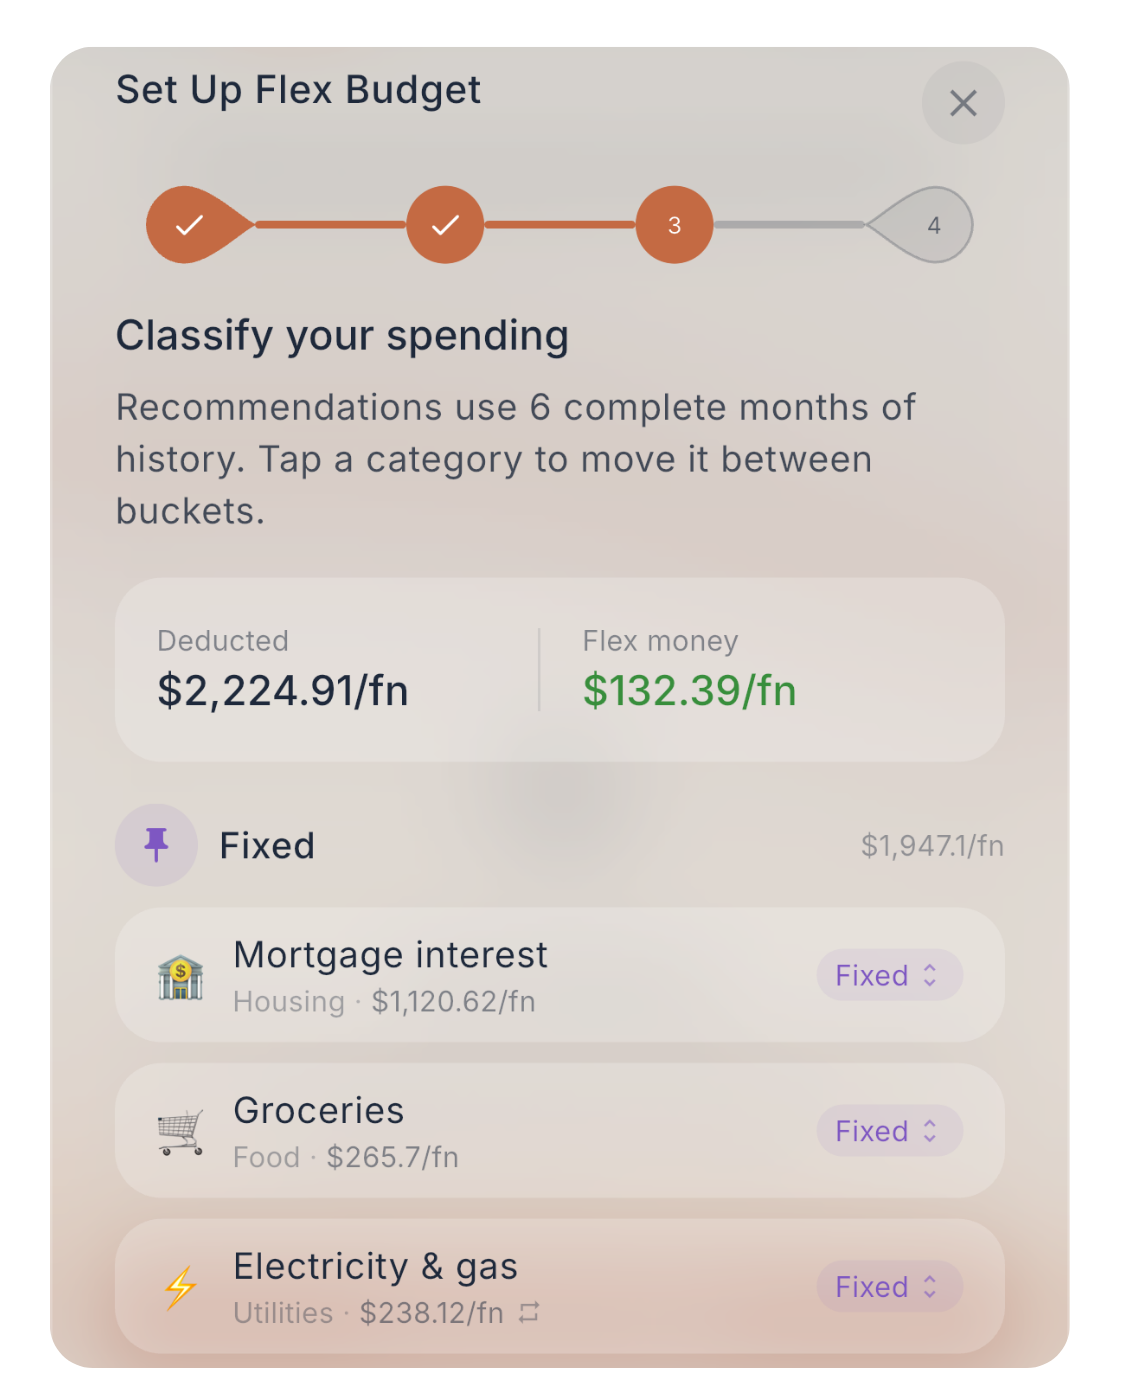
- Flex Budgeting: subtract fixed costs from income to see your flexible spending money for each period.
- Category Budgeting: set individual limits for categories such as food, transport, or entertainment, with support for detailed and zero-based
planning.
Follow the setup prompts to choose your budget period, confirm the income used for planning, and set your limits. Fireball then compares the relevant posted
transactions with the plan. Not sure what to set as the limit? Fireball can suggest amounts based on your spending, and you can always adjust it to find what suits your lifestyle. This is always the most overwhelming step for most people, we have made it so you don’t have to be a mathematician to build your budget. The insights and spending trends will guide you on how to modify your budget to meet your goals.
Not sure what to pick? Try one out, if it doesn’t suit then you can switch budgeting modes later without losing the data already saved in the other modes. After setup, use the + button to add another budget and the
settings button to change budget-wide options.
You have the optional to set up your goals and include it into your budget later.
5. Review recurring payments and income
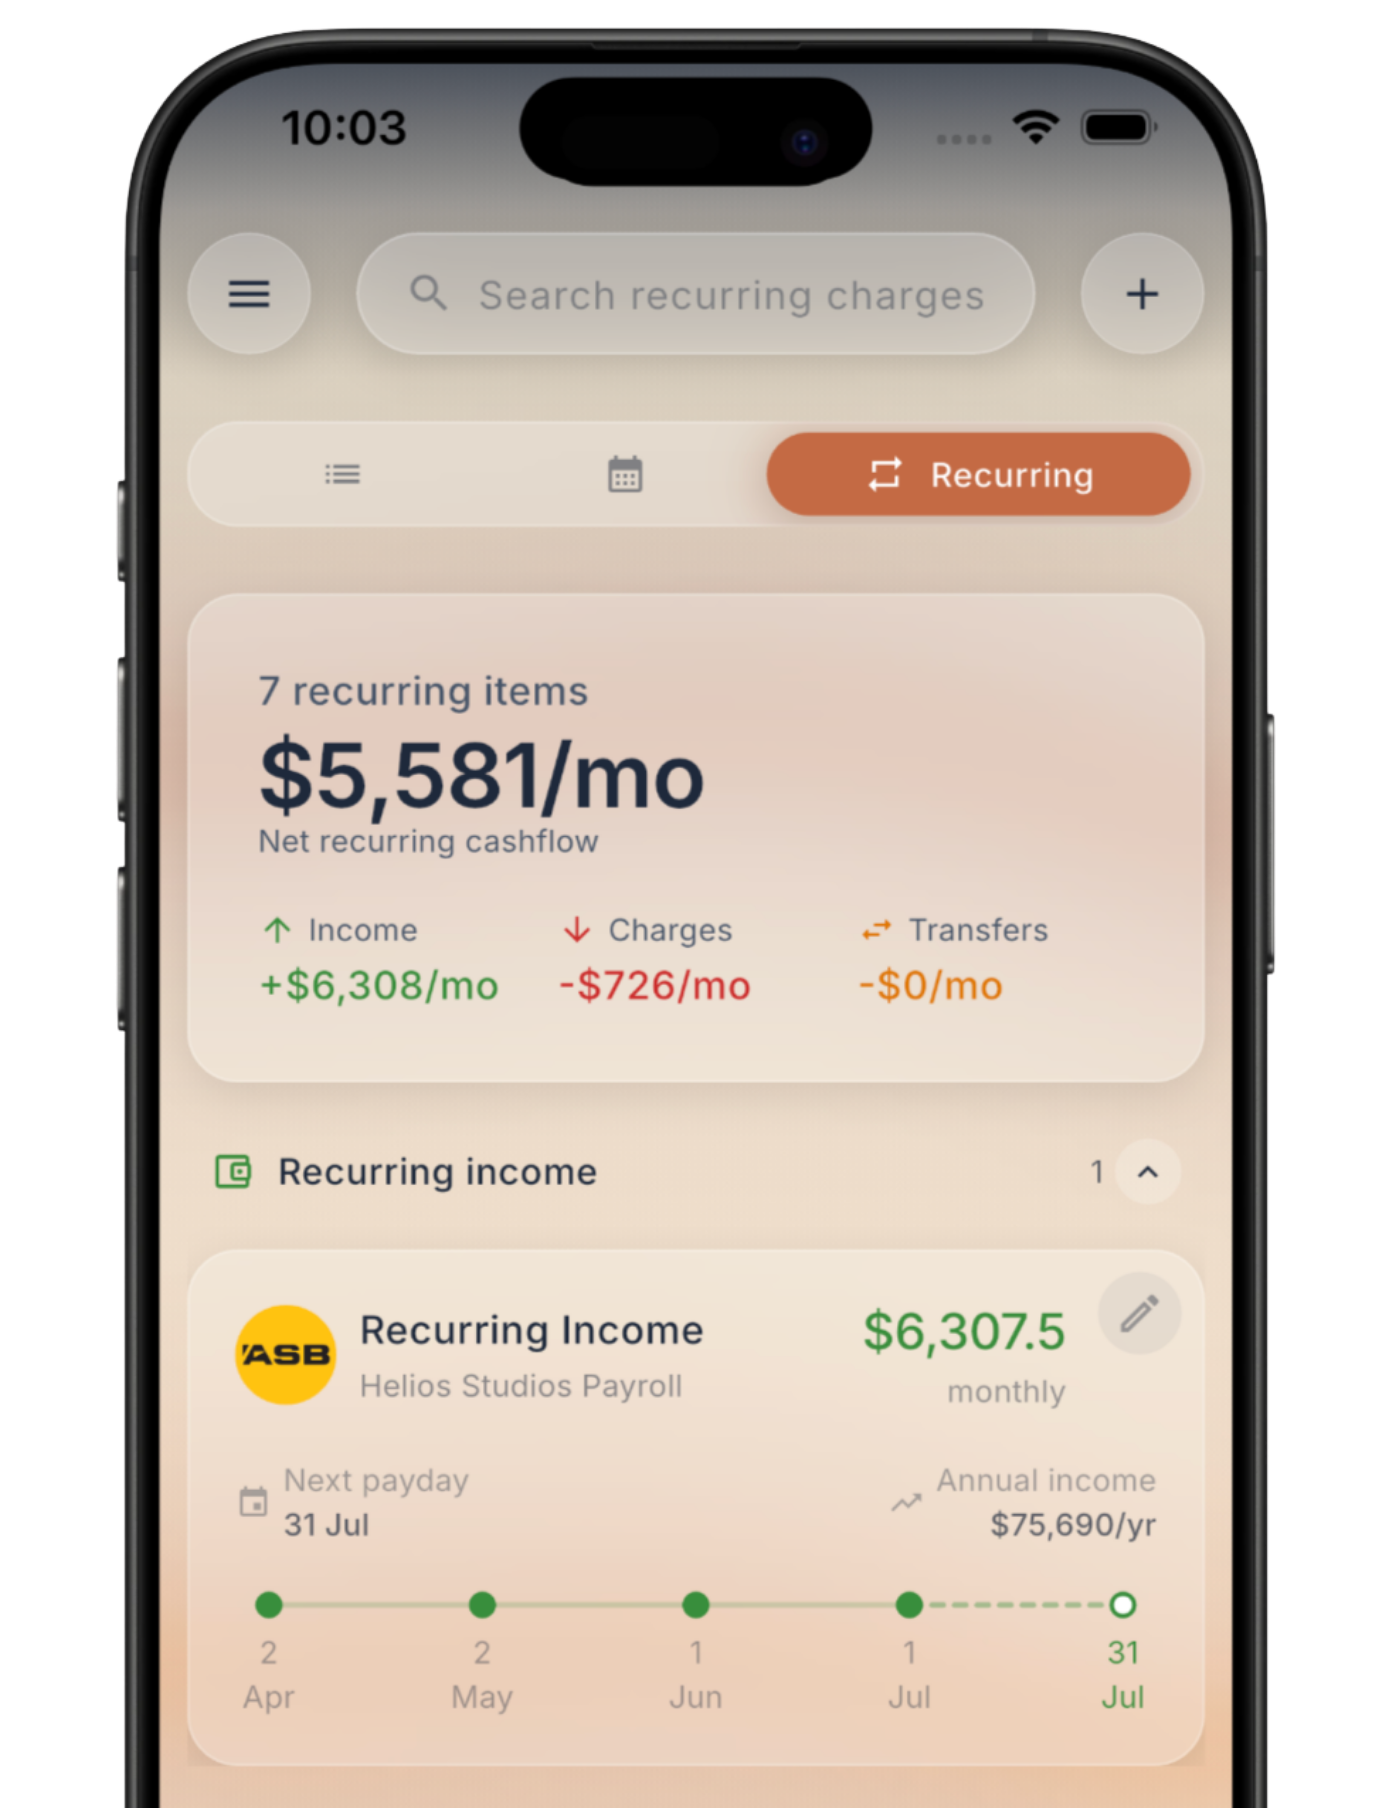
Fireball looks for regular charges, bills, income, and transfer commitments in
your transaction history.
1. Open Activity.
2. Select Recurring.
3. Review the payments and income Fireball has detected.
4. Confirm, correct, hide, or defer items that need your attention.
If Fireball has not detected something, tap the + button while Recurring
is selected. You can add a Recurring charge, Recurring income or Recurring transfer manually.
Select Calendar in Activity to see how confirmed recurring activity fits
around your other transactions.
Recurring detection becomes more useful as older transaction history finishes
loading and Fireball sees more examples of each payment.
6. Check your FIRE plan
Fireball uses your balances, spending, savings, and planning assumptions to
estimate your progress towards financial independence. We understand everyone would have different expectations and lifestyles, the app allows you to tailor the FIRE journey.
Open the side menu and select FIRE Settings. Start with Plan setup, then Core Settings:
- Target retirement age
- Withdrawal rate
- Expected annual spending in retirement
If you do not enter a separate retirement-spending amount, Fireball uses your
current annual expenses. Review that assumption once enough transaction history has arrived.
You can also review Growth Estimates, New Zealand retirement, and optional FIRE
Variants such as Coast, Lean, Fat, or Barista FIRE. Only enable or change
assumptions you understand and intend to use. Tap Save when the plan reflects
your choices.
Fireball projections are planning estimates, not guarantees or personalised
financial advice.
7. Explore your insights
Open the main menu and select Insights. Available views depend on the data
in your account and can include:
- FIRE progress and net-worth projection
- Net-worth changes
- Income versus expenses
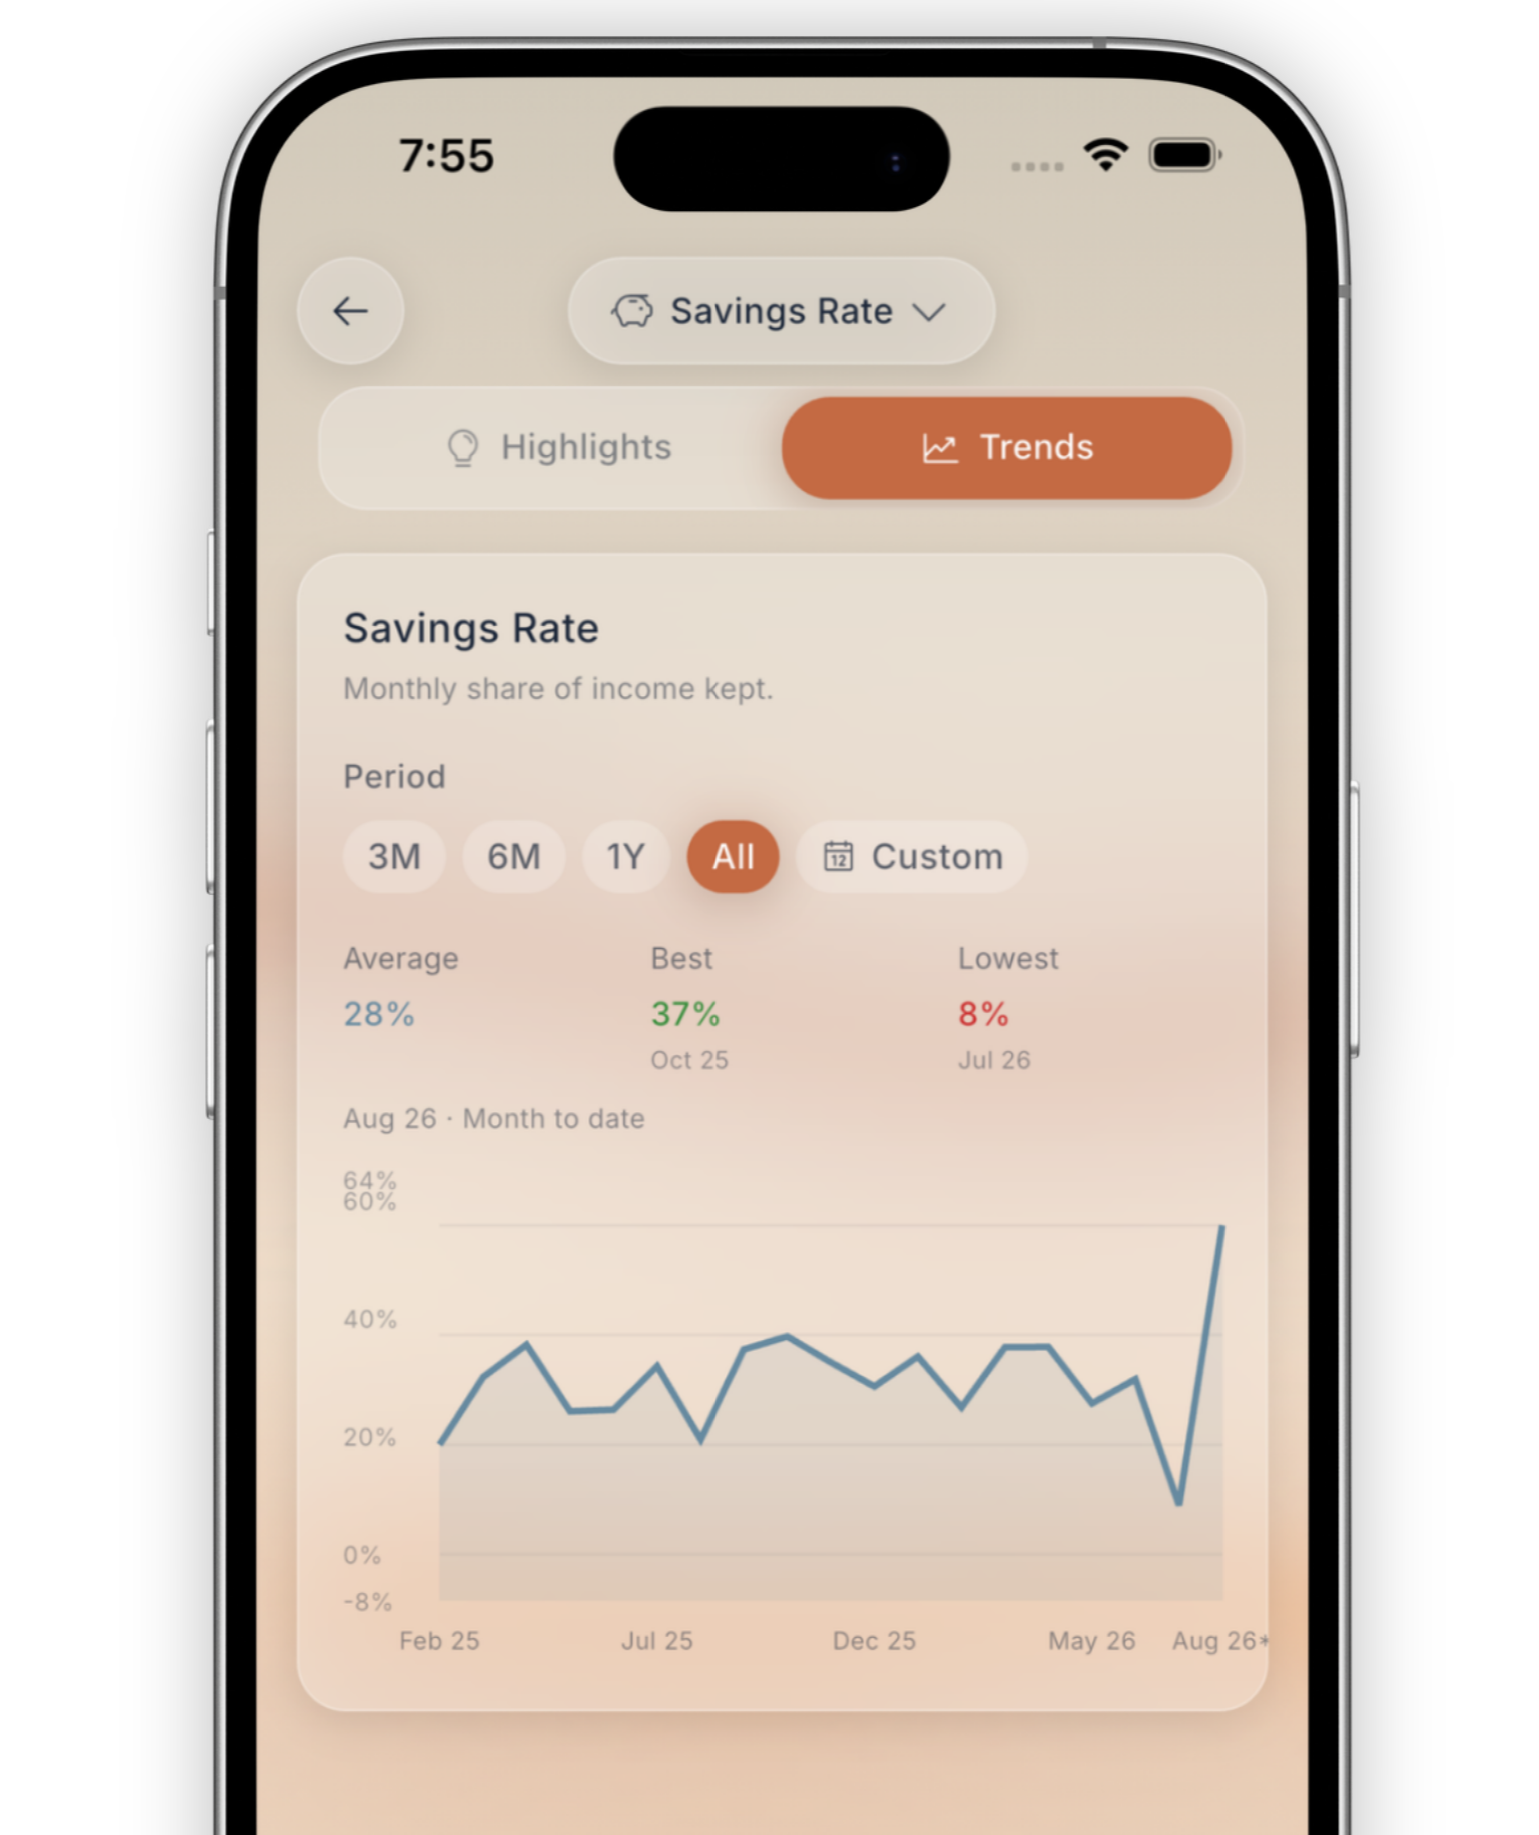
- Savings rate
- Investing
- Cash flow
- Recurring commitments
- Category breakdown
- Top merchants
Start with the insight recommended by the Getting Started guide, then swipe
or use the selector to explore the others. An insight may say that there is not
enough data yet if your connection is new or a relevant account was not
selected.
You are ready when
Your initial setup is in good shape when:
- Your everyday and important debt or investment accounts appear in
Accounts.
- Account-related items in Needs review are resolved.
- Your recent transactions have sensible categories.
- You have selected a budgeting style and created a first budget.
- Recurring payments and income have been reviewed.
- Your FIRE assumptions reflect the plan you want to explore.
- Your Insights screens are beginning to populate.
You can refine all of these later. You have done the hardest part at the start, from here the app should require little maintenance. Fireball will continue updating as new transactions arrive and as you add accounts, assets, budgets, goals, or
planning details.
If you are blocked during setup, contact Fireball support. Describe
the screen and step where the problem occurred, but never send a bank password or authentication code.
Still need a hand?
Browse the Help Centre or contact support and we will help you find the next step.